Pen-Testing From a Mile Away
by Asim Zaman
Introduction
Are you unimpressed with your wireless card's range? Fed up with limited number of available access points?
And like many other families in America, have a now unused satellite dish cluttering up your house? Constructing a Wi-Fi satellite dish can greatly extend your Wi-Fi range and open up many new interesting possibilities.
During my time working as a help desk tech for an office building, I was eventually given the task of setting up their wireless network. With this came the penetration testing, to see how vulnerable they actually were. Now, here I faced the difficult task of wandering around the building trying to get in range of all the various access points due to my built-in wireless card's pathetic range, all the while jumping from power plug to power plug due to my pathetic battery.
This kind of job can be tiresome and can grow into an even worse problem when dealing with larger area projects such as college campuses or corporate parks. The Wi-Fi satellite dish allows you to cover a seemingly endless range with no movement whatsoever. The potential is infinite.
Parts
When beginning this project, you are going to want to gather up six different parts. Each is essential to the operation of the satellite dish.
Dish
Any satellite dish will do, but it helps to have the antenna (the small pronged piece that extends out and resides in the hot spot of the satellite dish). A lot of times, dish networks will take back this piece, but you may get lucky and find a complete dish. Without the antenna, you will have to manually find the best spot to position your handmade receiver, which can be accomplished by a trial-and-error method.
Wi-Fi Adapter
I recommend purchasing the ALFA Network's AWUS036H. This particular Wi-Fi USB adapter is equipped with several features that are much better than other models:
- The chipset. This make and model contains the Realtek RTL8187 chipset, which is very compatible with Aircrack-ng and BackTrack. This allows it to be ideal for pen-testing.
- The power output in this model is higher than that of other USB dongles in that it was built as a long-range USB adapter. It therefore is capable of even further increasing your range.
- The SMA male connector. This particular feature is essential for connecting the Wi-Fi module to the dish. This port is the segment where the antenna would normally attach.
Cable
This cable needs to be the SMA female to N connector cable. By searching for this on Amazon or on Google, you can find one for a minimal price. I recommend getting one of six to twelve feet in length to give you plenty of maneuverability. The following materials are used to create the satellite antenna.
- Copper Wire: Simple enough.
- Copper Flashing: A little expensive but still easy to find.
- The N Connector: This piece may be the most difficult to procure, but a good place to start is at a local electronics store, or again from Amazon. The official name for this is "Coaxial Connector, N Type Panel Jack (Square Mtg)"
Assembling
Once all of these materials have been accumulated, the actual construction can begin. The only real construction that needs to be done is the assembling of the antenna. During this assembly you will need to solder the copper pieces to the N connector and attach the N connector to the copper flashing. This can be done in a few simple steps.
First, you must cut a length of wire measuring 244 mm in length. Then, you will mark the wire every 31 mm so that you will have eight equal segments. You will now begin to bend the wire into a series of 90 degree angles that will end up in the shape of a double diamond. To make really sharp edges, I recommend that you use two pairs of pliers held perpendicular to each other. This way, when they are twisted against each other, you get a very sharp 90 degree angle. The best way to complete the double diamond is to bend it into two equal squares.
The next section is building the mounding element. First, cut out a 110 mm square of black plastic and drill a hole in the center wide enough for the white piece of the N connector to clear. Now you need to solder the copper wire to the N connector. You should fit two pieces of copper wire (length does not matter - they will be cut later anyway) and solder them at two points. The first wire should be directly fitted into the N connector's gold pin and soldered there. The other wire should be connected just outside the lowest metal ring on the metal panel itself. I recommend you use a propane or butane torch for this pan, as a soldering iron does not produce the heat necessary to bond the metals.
After the connector is cooled, attach it to the black plastic base using an epoxy. The copper flashing should be attached to the front and trimmed to fit, also with a hole drilled to allow the N connector to pass through.
The next step is to solder your bow tie shaped element to the vertical wires. I recommend you use two pieces of scrap copper flashing, 15 mm wide to support the double diamond so the height is even on both sides. Then it is the simple task of soldering the wires together.
Next was the task of mounting and attaching the antenna to the dish's antenna. Each satellite antenna differs with the make and model but essentially you must remove all the plastic covering pieces so that the receiver's hole is apparent. Then you must feed the wire through this hole and connect it to the antenna and to the Wi-Fi module. Once this is complete you are ready for action.
Conclusion
My usage of this module was for penetration testing and that is how I tested this dish's effectiveness. I used the Airodump-ng program on my BackTrack 4 Final virtual machine and was able to receive a much greater range of Wi-Fi access points.
Before, with just the bare module, I would pick up approximately four or five points in my target area. But after I put the dish online, the amount of access points refreshed off the end of the my monitor.

Completed Antenna Module

Completed Satellite Dish
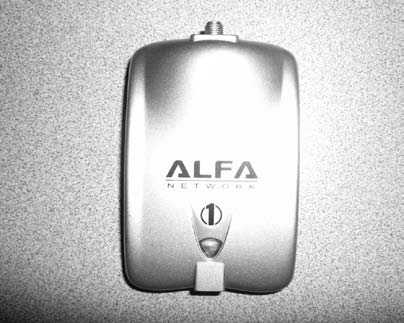
Wireless module