Pro-2052: How to Manually Store IDs into Scan
Lists
In this tutorial, you will be shown how to manually store IDs into scan
lists. When you program trunked frequencies into a bank, your scanner sets up 5 scan lists
into which you can store your favorite IDs. Each list can contain up to 10 IDs, so you can
store a total of 50 IDs for each trunk scanning bank (1000 IDs if you use all banks as
trunking banks). Scan lists help you organize trunking system users into categories. For
example, you might use List 1 for police IDs, List 2 for fire department IDs, List 3 for
emergency medical service IDs, and so on. Once IDs are stored in lists, you can scan them
like you scan conventional channels. You can program IDs into scan lists manually, during
a search or automatically.
There are two sub-tutorials in this tutorial:
For additional information on this product, see the links below:
Manually Store IDs into Scan Lists
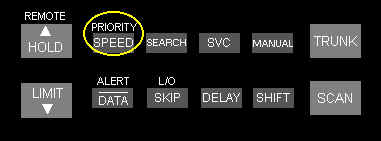
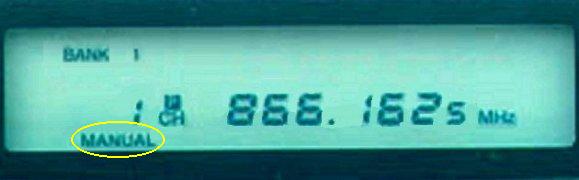
| Step 1: Enter
Manual Mode |
| |
|
| |
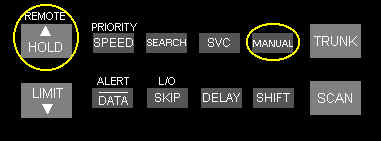
| Select the
desired trunking bank (see "Scanning a Trunked Bank", if
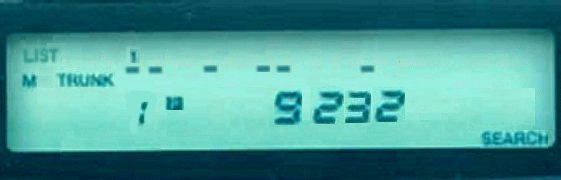
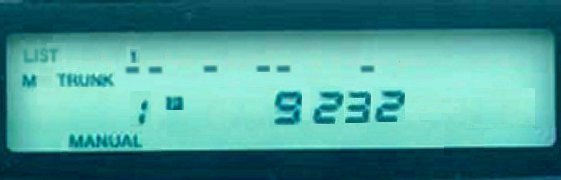
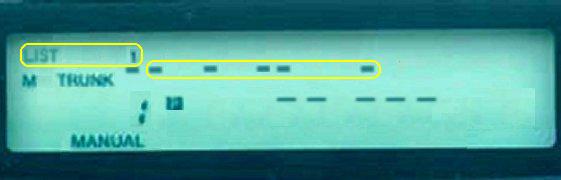
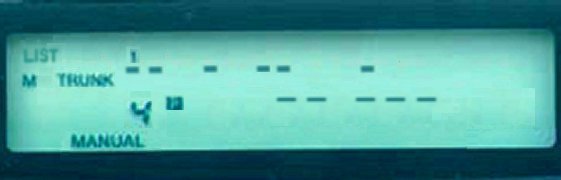
you are unsure what this means). After the scanner begins trunk scanning, press MANUAL.
A scan list number appears at the top of the display, and a bar shows the channel
activity. They are circled on the display. |
| |
|
|
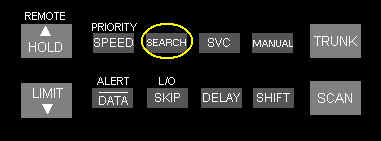
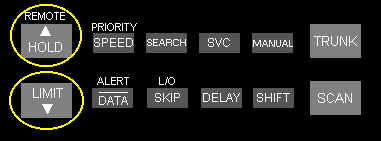
| Step 2: Select
the Scan List Location |
| |

|
| |
| Repeatedly
press the UP or DOWN arrow keys to select the scan list
location you want to program. |
| |
|
|
| Step
3: Enter the ID to Store |
| |

|
| |
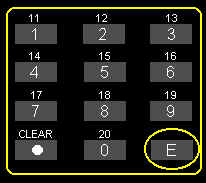
| Enter the Type
II ID you want to store, then press E. To enter a Type I ID:
- Use the number keys to enter the block number and the fleet number, then press (.).
- Enter the subfleet number, then press E.
To enter an EDACS ID:
- Use the number keys to enter the agency number, then press E.
- Enter the fleet number, then the subfleet number, then press E.
Note: To clear a mistake while entering an ID, press CLEAR,
then start over at Step 3. |
| |
|
|
| Step 4: Select
Additional Scan List Locations |
| |
|
| |
| Repeatedly
press MANUAL or the UP arrow key to select the next scan
list location you want to program. Then repeat Step 3 to enter
another ID. |
| |
|
|
| Step 5: Return
to Conventional Scanning |
| |
|
| |
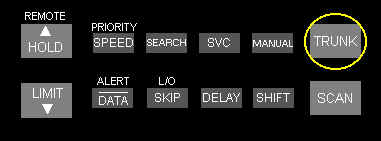
| Press TRUNK
to return to conventional scanning and exit programming. |
| |
|
Store IDs into
Scan Lists when in Search Mode
Copyright© RadioShack
Corporation 2001. All rights reserved.
Privacy Policy